

This Mochi Recipe with Mochiko Flour is a simple and authentic way to make soft, chewy Japanese mochi right at home. Using sweet rice flour, a sweet homemade red bean filling, and a quick microwave method, this recipe creates delicious mochi with the perfect texture. Whether you’re making mochi for a holiday celebration, a special dessert, or simply to satisfy your sweet tooth, this easy recipe is beginner-friendly and delivers wonderful results every time.
Why You’ll Love This Recipe
This homemade mochi recipe is surprisingly easy and requires only a handful of pantry ingredients. The microwave cooking method makes preparation fast without sacrificing the chewy texture that makes mochi so popular. The sweet azuki bean filling pairs beautifully with the soft rice dough, creating a traditional Japanese dessert that’s naturally gluten-free and fun to make.
Highlights
- Soft and chewy homemade mochi
- Easy microwave cooking method
- Authentic Japanese dessert
- Sweet homemade red bean filling
- Naturally gluten-free
- Great for holidays and celebrations
- Beginner-friendly recipe
Ingredients
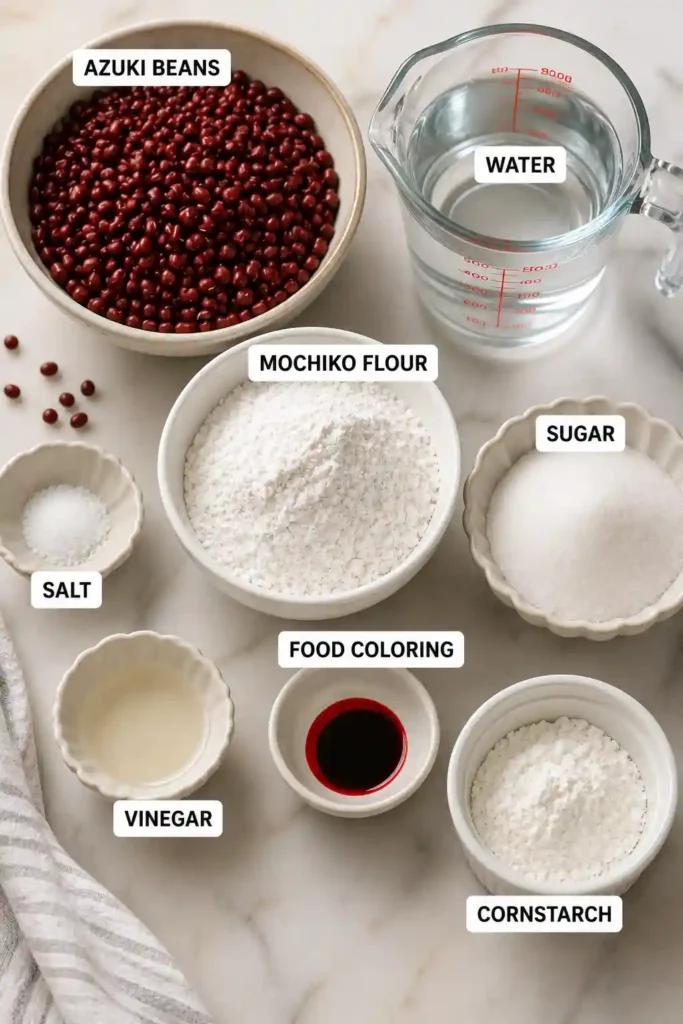
For the Red Bean Filling
- 1 cup azuki beans
- 4 cups water
- 1 pinch salt
- ½ cup granulated sugar
For the Mochi Dough
- 1½ cups Mochiko sweet rice flour
- 1 cup granulated sugar
- 1½ cups water
- 2 drops distilled white vinegar
- Food coloring (optional)
For Shaping
- 1 cup cornstarch or additional Mochiko flour
Instructions
Step 1: Prepare the Azuki Beans
Rinse the azuki beans thoroughly under cold water and remove any debris or damaged beans.
Transfer the beans and water to an Instant Pot.
Seal the lid and cook using the Bean/Chili setting for 25 minutes.
Allow the pressure to release naturally for about 15 minutes before opening the lid.
Drain the cooked beans and return them to the Instant Pot using the sauté function.
Add the sugar and stir until completely dissolved.
Turn off the heat and allow the mixture to cool for 1 to 2 hours, or refrigerate until thickened.
Once cooled, roll the bean mixture into small balls about ½ inch in diameter. Place them on parchment paper while preparing the mochi dough.
Step 2: Make the Mochi Dough
In a microwave-safe bowl, whisk together the Mochiko flour and sugar.
In a separate bowl, combine the water and vinegar.
Slowly pour the liquid into the flour mixture while whisking until completely smooth with no lumps remaining.
Add a few drops of food coloring if desired and stir until evenly mixed.
Cover the bowl with plastic wrap or a microwave-safe plate.
Microwave on high for 1 minute.
Remove the bowl and stir well.
Cover again and microwave for another minute.
Repeat this process until the dough has cooked for about 4 minutes total.
The dough should become glossy, sticky, and slightly translucent. Even if a small portion in the center looks softer than the edges, the dough is fully cooked.
Stir thoroughly with a sturdy spoon until smooth.
Step 3: Shape the Mochi
Generously dust your work surface with cornstarch or Mochiko flour.
Transfer the hot mochi dough onto the prepared surface and dust the top generously to prevent sticking.
Allow the dough to cool slightly until comfortable to handle.
Flatten the dough to approximately ¼-inch thickness.
Cut or portion the dough into equal pieces about 3½ to 4 inches wide.
Place one prepared red bean ball in the center of each dough round.
Carefully pull the edges of the dough over the filling and pinch tightly to seal completely.
Roll gently between your hands until smooth.
Place each finished mochi seam-side down on a plate dusted with cornstarch or Mochiko flour.
Continue until all the dough and filling have been used.
If the dough begins to dry while shaping, lightly moisten it with a few drops of water or dust it with powdered sugar to restore its soft, pliable texture.

Tips & Tricks
- Always dust your hands and work surface generously with cornstarch to prevent sticking.
- Stir the dough well after each microwave interval for even cooking.
- Avoid overcooking the dough, which can make it firm.
- Let the filling cool completely before assembling the mochi.
- Use gel food coloring for brighter colors without adding excess liquid.
- Keep finished mochi covered with plastic wrap to prevent drying out.
- Work while the dough is still warm for easier shaping.
Details
Prep Time: 30 minutes
Cook Time: 30 minutes
Cooling Time: 2 hours
Total Time: 3 hours
Yield: 12 mochi
Category: Dessert
Method: Microwave
Cuisine: Japanese
Difficulty: Intermediate
Dietary Notes:
- Vegetarian
- Gluten-Free
- Nut-Free

Notes
- Fresh strawberries, mango, or fresh fruit can replace the red bean filling.
- Matcha powder may be added to the dough for green tea mochi.
- Coconut milk can replace part of the water for a richer flavor.
- Store unused cornstarch in a separate container for future use.
- Mochi is best enjoyed the same day it’s made for the softest texture.
Nutrition (Approximate Per Mochi)
- Calories: 175
- Protein: 3g
- Carbohydrates: 39g
- Fat: 0.5g
- Fiber: 2g
- Sugar: 18g
- Sodium: 35mg
Frequently Asked Questions
What is Mochiko flour?
Mochiko flour is a finely milled sweet rice flour made from glutinous rice. Despite the name, it does not contain gluten and gives mochi its signature chewy texture.
Can I make mochi without an Instant Pot?
Yes. Simmer the azuki beans on the stovetop for about 1½ to 2 hours until tender before adding the sugar.
Why is my mochi so sticky?
Mochi is naturally sticky. Using plenty of cornstarch or Mochiko flour while shaping helps prevent sticking.
Can I freeze homemade mochi?
Yes. Wrap each piece individually in plastic wrap and freeze in an airtight container for up to one month.
How long does homemade mochi last?
Fresh mochi is best eaten within 1 to 2 days. Store it in an airtight container at room temperature or refrigerate for slightly longer storage.
Can I use different fillings?
Absolutely. Ice cream, chocolate ganache, strawberries, peanut butter, matcha cream, and fruit preserves are all popular alternatives.
Storage
Room Temperature
Store in an airtight container for up to 2 days.
Refrigerator
Store for up to 4 days. Allow the mochi to come to room temperature before serving for the best texture.
Freezer
Wrap each mochi individually in plastic wrap and freeze for up to 1 month.
Thaw at room temperature for about 30 minutes before enjoying.

Similar Recipes

Mochi Recipe with Mochiko Flour
Ingredients
For the Red Bean Filling
- 1 cup azuki beans
- 4 cups water
- 1 pinch salt
- ½ cup granulated sugar
For the Mochi Dough
- 1½ cups Mochiko sweet rice flour
- 1 cup granulated sugar
- 1½ cups water
- 2 drops distilled white vinegar
- Food coloring optional
For Shaping
- 1 cup cornstarch or additional Mochiko flour
Instructions
- Step 1: Prepare the Azuki Beans
- Rinse the azuki beans thoroughly under cold water and remove any debris or damaged beans.
- Transfer the beans and water to an Instant Pot.
- Seal the lid and cook using the Bean/Chili setting for 25 minutes.
- Allow the pressure to release naturally for about 15 minutes before opening the lid.
- Drain the cooked beans and return them to the Instant Pot using the sauté function.
- Add the sugar and stir until completely dissolved.
- Turn off the heat and allow the mixture to cool for 1 to 2 hours, or refrigerate until thickened.
- Once cooled, roll the bean mixture into small balls about ½ inch in diameter. Place them on parchment paper while preparing the mochi dough.
- Step 2: Make the Mochi Dough
- In a microwave-safe bowl, whisk together the Mochiko flour and sugar.
- In a separate bowl, combine the water and vinegar.
- Slowly pour the liquid into the flour mixture while whisking until completely smooth with no lumps remaining.
- Add a few drops of food coloring if desired and stir until evenly mixed.
- Cover the bowl with plastic wrap or a microwave-safe plate.
- Microwave on high for 1 minute.
- Remove the bowl and stir well.
- Cover again and microwave for another minute.
- Repeat this process until the dough has cooked for about 4 minutes total.
- The dough should become glossy, sticky, and slightly translucent. Even if a small portion in the center looks softer than the edges, the dough is fully cooked.
- Stir thoroughly with a sturdy spoon until smooth.
- Step 3: Shape the Mochi
- Generously dust your work surface with cornstarch or Mochiko flour.
- Transfer the hot mochi dough onto the prepared surface and dust the top generously to prevent sticking.
- Allow the dough to cool slightly until comfortable to handle.
- Flatten the dough to approximately ¼-inch thickness.
- Cut or portion the dough into equal pieces about 3½ to 4 inches wide.
- Place one prepared red bean ball in the center of each dough round.
- Carefully pull the edges of the dough over the filling and pinch tightly to seal completely.
- Roll gently between your hands until smooth.
- Place each finished mochi seam-side down on a plate dusted with cornstarch or Mochiko flour.
- Continue until all the dough and filling have been used.
- If the dough begins to dry while shaping, lightly moisten it with a few drops of water or dust it with powdered sugar to restore its soft, pliable texture.
Notes
- Fresh strawberries, mango, or fresh fruit can replace the red bean filling.
- Matcha powder may be added to the dough for green tea mochi.
- Coconut milk can replace part of the water for a richer flavor.
- Store unused cornstarch in a separate container for future use.
- Mochi is best enjoyed the same day it’s made for the softest texture.
Conclusion
This Mochi Recipe with Mochiko Flour is a delicious introduction to traditional Japanese sweets. Soft, chewy rice dough wrapped around a sweet homemade red bean filling creates a dessert that’s both elegant and comforting. Thanks to the simple microwave method, making authentic mochi at home has never been easier. Whether you enjoy classic red bean mochi or experiment with your favorite fillings, this recipe is sure to become a favorite for special occasions and everyday treats