
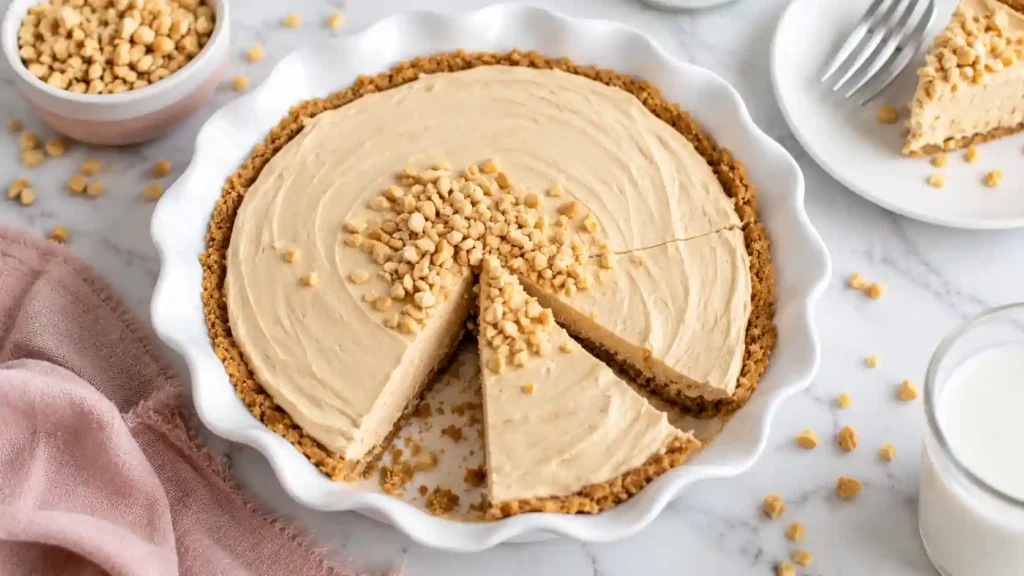
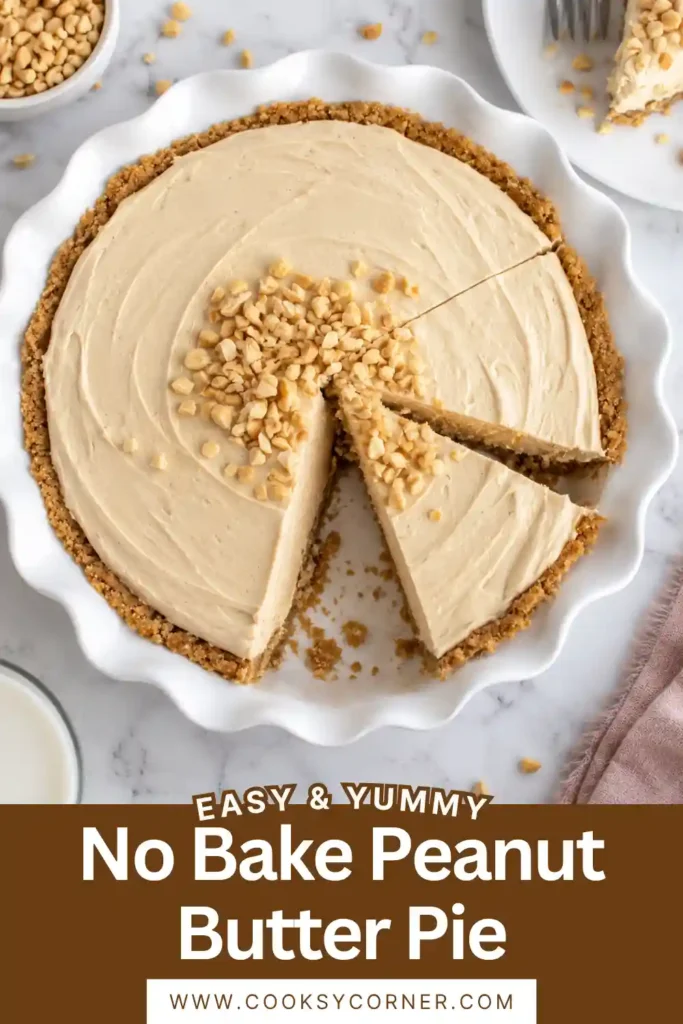
No Bake Peanut Butter Pie is a cool, creamy dessert with a rich peanut butter filling and a buttery graham cracker crust. It takes just a few minutes to mix together, then the refrigerator does the rest of the work.
Cream cheese gives the filling a gentle tang, powdered sugar adds sweetness, and whipped topping makes every bite light and fluffy. The result is a peanut butter cream cheese pie that feels special enough for a celebration but is simple enough for an ordinary weekend.
There’s no oven to preheat and no complicated technique to master. If you can beat a few ingredients together and fold in whipped cream, you can make this pie.
Why You’ll Love This Recipe
- No oven needed: A prepared no-bake crust and chilled filling keep the process simple.
- Creamy peanut butter flavor: Peanut butter is the star, balanced by tangy cream cheese.
- Just five ingredients: The crust, peanut butter, cream cheese, powdered sugar, and whipped topping are all you need.
- Easy to make ahead: The pie needs at least two hours to chill and can be prepared the night before serving.
- Great for sharing: A 9-inch pie makes a generous family dessert.
- Flexible topping: Use a suitable thawed whipped topping or homemade whipped cream.
Ingredients
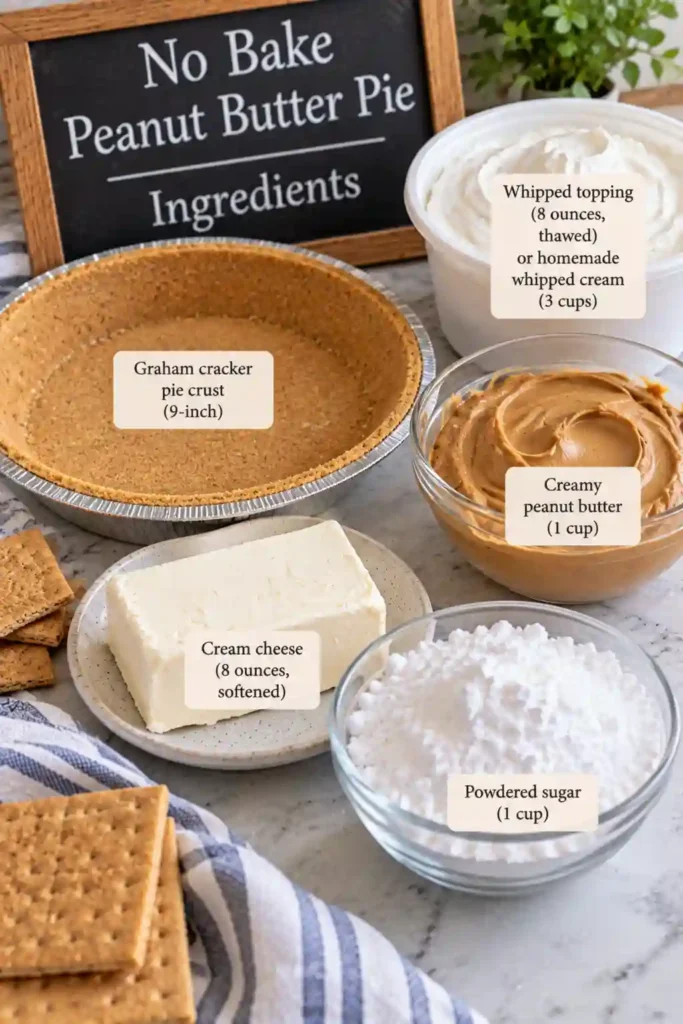
- 1 prepared 9-inch no-bake graham cracker pie crust, made with halal-suitable ingredients
- 1 cup creamy peanut butter
- 8 ounces cream cheese, softened and made with halal-suitable ingredients
- 1 cup powdered sugar
- 1 (8-ounce) container thawed halal-suitable whipped topping, or 3 cups homemade whipped cream
Instructions
Step 1: Chill the crust
Prepare the no-bake graham cracker crust in a 9-inch pie dish. Refrigerate it for at least 30 minutes, or freeze it for at least 15 minutes, before adding the filling.
A firm crust is easier to fill and slice without crumbling.
Step 2: Beat the peanut butter and cream cheese
Place the creamy peanut butter and softened cream cheese in a large mixing bowl.
Beat with an electric mixer until smooth and evenly combined. Stop to scrape down the sides of the bowl so no cream cheese streaks remain.
Step 3: Add the powdered sugar
Add the powdered sugar and beat again until fully incorporated. The mixture will be thick at this stage.
Step 4: Fold in the whipped topping
Add the thawed whipped topping, or homemade whipped cream, to the peanut butter mixture.
Use a spatula to fold it in gently until the filling is uniform in color and no white streaks remain. Avoid vigorous mixing, which can knock some of the air out of the filling.
Step 5: Fill the crust
Spoon the filling into the chilled graham cracker crust. Spread it evenly with a spatula and smooth the top.
Step 6: Refrigerate until set
Cover the pie and refrigerate for at least 2 hours, or overnight for a firmer filling.
The No Bake Peanut Butter Pie should be well chilled before slicing.
Step 7: Slice and serve
Use a sharp knife to cut the pie into slices. Wipe the blade between cuts for neater edges.
Serve chilled and return leftovers to the refrigerator promptly.
Tips & Tricks
Soften the cream cheese first. Cold cream cheese is harder to blend and can leave small lumps in the filling. Let it soften until it mixes easily, but do not leave it at room temperature for more than two hours.
Choose regular creamy peanut butter for the most predictable texture. Natural peanut butter that separates can make the filling softer or slightly oily. If using it, stir it thoroughly before measuring.
Chill the crust before filling. This helps the graham cracker crumbs hold together when you spread the filling.
Fold, don’t beat, the whipped topping. Gentle folding keeps the filling airy. If using homemade whipped cream, whip it to firm peaks before folding it into the peanut butter mixture.
Give the pie enough time to set. Two hours is the minimum, but overnight chilling is helpful when you want especially neat slices.
Check packaged ingredients for halal suitability. Choose graham crackers, cream cheese, and whipped topping made without unsuitable gelatin, enzymes, flavorings, or other additives. If making whipped cream from scratch, use suitable cream and alcohol-free vanilla if you choose to flavor it.
Details
- Prep Time: 15 minutes
- Crust Chill Time: 15–30 minutes
- Filling Chill Time: At least 2 hours
- Cook Time: 0 minutes
- Total Time: Approximately 2 hours 30 minutes to 2 hours 45 minutes
- Yield: One 9-inch pie, approximately 8 slices
- Category: Dessert
- Method: No-Bake, Chilling
- Cuisine: American-Inspired
- Difficulty: Easy
- Dietary Notes: Halal-friendly when prepared with verified suitable ingredients. Contains peanuts, wheat, and dairy; check the labels of packaged ingredients for additional allergens.
Notes
Whipped topping or homemade whipped cream: Either works in this recipe. A thawed whipped topping generally gives a stable filling, while homemade whipped cream offers a fresh dairy flavor. Measure 3 cups after whipping if using homemade whipped cream.
Crust options: A homemade graham cracker crust works well, but a suitable store-bought no-bake crust saves time. If making your own, chill it thoroughly before adding the filling.
Serving suggestions: A small spoonful of whipped cream, a light dusting of cocoa powder, or a few chopped peanuts can make each slice look finished without overpowering the peanut butter flavor.
For clean slices: Chill the pie overnight and use a knife dipped in warm water, wiping it dry between cuts.
Nutrition
Approximate nutrition per slice, based on 8 slices and a typical prepared graham cracker crust with an 8-ounce whipped topping:
- Calories: 500–580 kcal
- Protein: 10–13 g
- Carbohydrates: 43–52 g
- Fat: 34–40 g
These estimates vary with the peanut butter, crust, cream cheese, and whipped topping used.
FAQ
1. How long does a no bake peanut butter pie need to chill?
The filling needs at least 2 hours in the refrigerator to firm up. For cleaner slices, refrigerate it overnight. Chill the graham cracker crust separately before adding the filling.
2. Can I make this easy peanut butter pie the day before serving?
Yes. This is a convenient make ahead peanut butter dessert because it needs time to set. Prepare it the night before, cover it, and keep it refrigerated until you are ready to slice.
3. Can I use homemade whipped cream instead of Cool Whip?
Yes. Replace the 8-ounce container of whipped topping with 3 cups of homemade whipped cream. Whip the cream to firm peaks, then fold it gently into the peanut butter mixture. Homemade whipped cream may produce a slightly softer filling.
4. Why is my creamy peanut butter pie filling lumpy?
The cream cheese may have been too cold when you mixed it with the peanut butter. Start with softened cream cheese and beat those two ingredients until completely smooth before adding the powdered sugar.
5. Can I use natural peanut butter in this no bake peanut butter pie recipe?
You can, but the texture may be less predictable. Natural peanut butter can separate into oil and solids, so stir it thoroughly before measuring. Regular creamy peanut butter generally creates a more consistent filling.
6. How do I keep a graham cracker crust pie from crumbling?
Chill the crust for at least 30 minutes in the refrigerator or 15 minutes in the freezer before filling it. Spread the filling gently rather than pressing hard against the crust, and slice the finished pie only after it has chilled.
Storage
Refrigerator
Cover the pie tightly or place individual slices in airtight containers. Refrigerate at 40°F (4°C) or below and enjoy within 3–4 days.
For the best appearance, add any optional toppings just before serving.
Freezer
Freeze the pie whole or in individual slices. Wrap it securely and place it in a freezer-safe container. For best quality, enjoy within 1–2 months.
Thaw overnight in the refrigerator. A pie made with homemade whipped cream may have a slightly different texture after freezing and thawing.
Reheating
Do not reheat this pie. It is intended to be served chilled.
Similar Recipes
No Bake Peanut Butter Pie
Ingredients
- 1 prepared 9-inch no-bake graham cracker pie crust made with halal-suitable ingredients
- 1 cup creamy peanut butter
- 8 ounces cream cheese softened and made with halal-suitable ingredients
- 1 cup powdered sugar
- 1 8-ounce container thawed halal-suitable whipped topping, or 3 cups homemade whipped cream
Instructions
- Step 1: Chill the crust
- Prepare the no-bake graham cracker crust in a 9-inch pie dish. Refrigerate it for at least 30 minutes, or freeze it for at least 15 minutes, before adding the filling.
- A firm crust is easier to fill and slice without crumbling.
- Step 2: Beat the peanut butter and cream cheese
- Place the creamy peanut butter and softened cream cheese in a large mixing bowl.
- Beat with an electric mixer until smooth and evenly combined. Stop to scrape down the sides of the bowl so no cream cheese streaks remain.
- Step 3: Add the powdered sugar
- Add the powdered sugar and beat again until fully incorporated. The mixture will be thick at this stage.
- Step 4: Fold in the whipped topping
- Add the thawed whipped topping, or homemade whipped cream, to the peanut butter mixture.
- Use a spatula to fold it in gently until the filling is uniform in color and no white streaks remain. Avoid vigorous mixing, which can knock some of the air out of the filling.
- Step 5: Fill the crust
- Spoon the filling into the chilled graham cracker crust. Spread it evenly with a spatula and smooth the top.
- Step 6: Refrigerate until set
- Cover the pie and refrigerate for at least 2 hours, or overnight for a firmer filling.
- The No Bake Peanut Butter Pie should be well chilled before slicing.
- Step 7: Slice and serve
- Use a sharp knife to cut the pie into slices. Wipe the blade between cuts for neater edges.
- Serve chilled and return leftovers to the refrigerator promptly.
Notes
Conclusion
No Bake Peanut Butter Pie combines a crisp graham cracker crust with a fluffy, rich peanut butter filling—and it comes together without turning on the oven. With a little mixing and enough time in the refrigerator, you’ll have a creamy dessert that slices beautifully and is easy to share.
Make it ahead, keep it chilled, and enjoy every peanut buttery bite.