

Hawaiian Roll Grilled Cheese Sliders turn soft, slightly sweet rolls into warm, cheesy little sandwiches with golden garlic-buttered edges. Cheddar melts between three thin bread layers, while oregano and optional parsley add a savory finish.
These sliders bake together in the oven, making them a convenient choice for lunch, a casual gathering, or a family movie night. Serve them warm with tomato soup, marinara, or your favorite dip.
Why You’ll Love This Recipe
- Sweet and savory flavor: Soft Hawaiian-style rolls pair beautifully with sharp or mild cheddar.
- Extra cheesy layers: Three horizontal bread layers create two spaces for melted cheese in each slider.
- Easy oven method: No need to stand at the stove cooking individual sandwiches.
- Garlic-herb butter: A quick mixture of butter, garlic powder, and oregano adds flavor and helps the bread turn golden.
- Great for sharing: Twelve mini sandwiches are easy to serve as snacks, sides, or party bites.
- Halal-friendly: Choose suitable rolls and butter, plus cheddar made with microbial or halal-certified rennet.
Ingredients
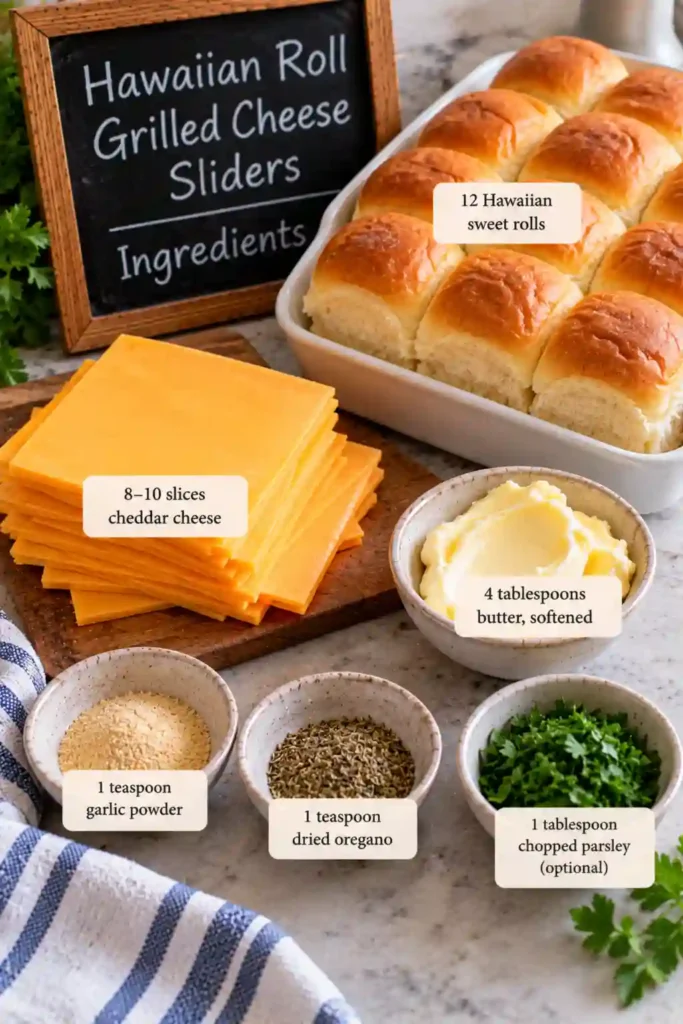
- 12 halal-suitable Hawaiian-style sweet rolls
- 8–10 slices halal-suitable cheddar cheese made with microbial or halal-certified rennet, or more for extra-cheesy sliders
- 4 tablespoons halal-suitable butter, softened
- 1 teaspoon garlic powder
- 1 teaspoon dried oregano
- 1 tablespoon chopped parsley, optional
Instructions
Step 1: Preheat the oven
Preheat the oven to 350°F (175°C). Line a baking sheet with parchment paper if desired.
Step 2: Make the garlic-herb butter
In a small bowl, mix the softened butter, garlic powder, dried oregano, and optional parsley until evenly combined.
Step 3: Slice the rolls into three layers
Separate the rolls if they are attached. Using a serrated knife, carefully slice each roll horizontally into three bread layers: a bottom, a middle, and a top. This creates two spaces for cheese in each slider.
Keep the layers from each roll together so they are easy to reassemble.
Step 4: Butter the bread
Spread the garlic-herb butter over the cut surfaces of the bread. Divide it as evenly as possible among all 12 rolls.
Step 5: Add the cheddar
Cut or tear the cheddar slices into pieces that fit the rolls. Place cheese between the bottom and middle layers, then add more cheese between the middle and top layers.
Divide the 8–10 slices among the 12 sliders, using additional cheese if you prefer them extra cheesy.
Step 6: Arrange on the baking sheet
Reassemble the sliders and place them on the prepared baking sheet. Keep a little space between them so the sides can brown.
Step 7: Bake and flip
Bake for 20–25 minutes, carefully flipping the sliders halfway through, until the bread is golden and the cheddar is melted.
Use a thin spatula to turn each slider gently. If a little cheese escapes, tuck it back in before returning the sliders to the oven.
Step 8: Serve warm
Let the Hawaiian Roll Grilled Cheese Sliders cool for a minute or two, then serve while the cheese is warm and melty. Pair with tomato soup, marinara, or your favorite dip.

Tips & Tricks
Use a serrated knife. Hawaiian-style rolls are soft, so a gentle sawing motion helps create three even layers without squashing the bread.
Keep the middle layer thin but sturdy. It should be thick enough to hold together while giving each slider two cheesy layers.
Soften, don’t melt, the butter. Softened butter is easier to spread across the cut surfaces without soaking the rolls.
Cut the cheese to fit. Smaller pieces distribute more evenly and are less likely to slide out during baking.
Flip carefully. Use a wide spatula and support the top of each slider as you turn it. The cheese may still be melting at the halfway point.
Watch the final minutes. Oven temperatures and roll sizes vary. Remove the sliders when the bread is golden and the cheese has melted, even if that happens slightly before the full baking time.
Check the cheese ingredients. Cheddar can be made with different types of rennet. Choose a product made with microbial or halal-certified rennet.
Check the rolls, too. Confirm that the sweet rolls and butter meet your halal requirements.
Details
- Prep Time: Approximately 15 minutes
- Cook Time: 20–25 minutes
- Total Time: Approximately 35–40 minutes
- Yield: 12 sliders
- Category: Appetizer, Snack, Lunch
- Method: Baking
- Cuisine: American-Inspired
- Difficulty: Easy
- Dietary Notes: Halal-friendly when made with suitable rolls, butter, and cheddar. Vegetarian when the cheese uses microbial rennet and all other ingredients are suitable. Contains wheat and dairy; check packaged rolls for egg, soy, and other allergens.

Notes
Cheese amount: Eight to ten slices provide a moderate amount of cheese across the 12 sliders. Add more if you want a thicker melted layer in each sandwich.
Cheddar choice: Mild cheddar melts into a mellow, creamy filling. Sharp cheddar brings a stronger cheese flavor.
Parsley: The chopped parsley is optional. It adds a fresh note to the garlic-herb butter but is not essential.
Serving suggestions: Serve with warm tomato soup for dipping, a small bowl of marinara, or a fresh salad to balance the rich cheese.
Best texture: These sliders are most enjoyable soon after baking, while the bread is golden and the cheese is still melted.
Nutrition
Approximate nutrition per slider, based on 12 sliders and 8–10 slices of cheddar:
- Calories: 190–250 kcal
- Protein: 6–9 g
- Carbohydrates: 16–22 g
- Fat: 11–15 g
Values vary with the brand and size of the rolls, the thickness of the cheddar slices, and any extra cheese added.
FAQ
1. Can I make baked grilled cheese sliders without a skillet?
Yes. These sliders bake on a sheet pan at 350°F (175°C) for 20–25 minutes, with a careful flip halfway through. The oven method is convenient when making several mini sandwiches at once.
2. Why are these Hawaiian roll cheese sliders cut into three layers?
Three horizontal bread layers create two spaces for cheddar in each roll. This gives the sliders extra cheesy bites while keeping them small enough to serve as finger food.
3. Can I prepare mini grilled cheese sandwiches ahead of time?
You can slice the rolls, cut the cheese, and mix the garlic-herb butter ahead of time. Refrigerate the butter and cheese, then assemble and bake the sliders shortly before serving for the best texture.
4. What makes these easy cheesy party sliders halal-friendly?
Use halal-suitable sweet rolls and butter, and choose cheddar made with microbial or halal-certified rennet. Check the labels of any dips you serve alongside them.
5. Can I use another cheese for garlic butter grilled cheese?
Yes. A halal-suitable melting cheese can replace some or all of the cheddar. Choose one that melts smoothly and has a flavor you enjoy with the sweet rolls and garlic-herb butter.
6. How do I keep oven baked grilled cheese from getting soggy?
Use softened rather than melted butter, avoid overloading the bread with cheese, and bake until the exterior is golden. Serve promptly rather than leaving the hot sliders covered, which can trap steam.
Storage
Refrigerator
Let leftover sliders cool, then place them in an airtight container and refrigerate within 2 hours. Store at 40°F (4°C) or below and use within 3–4 days.
Freezer
Wrap cooled sliders individually and place them in a freezer-safe container. Freeze for up to 1–2 months for best quality. The bread may be slightly softer after thawing.
Thaw overnight in the refrigerator before reheating.
Reheating
Warm the sliders on a baking sheet in a 325°F (165°C) oven until heated through and the cheese melts again. An air fryer can also help restore some crispness; check frequently to avoid overbrowning the sweet rolls.
For food safety, reheat leftovers to 165°F (74°C).

Similar Recipes

Hawaiian Roll Grilled Cheese Sliders: Easy Baked Bites
Ingredients
- 12 halal-suitable Hawaiian-style sweet rolls
- 8 –10 slices halal-suitable cheddar cheese made with microbial or halal-certified rennet or more for extra-cheesy sliders
- 4 tablespoons halal-suitable butter softened
- 1 teaspoon garlic powder
- 1 teaspoon dried oregano
- 1 tablespoon chopped parsley optional
Instructions
- Step 1: Preheat the oven
- Preheat the oven to 350°F (175°C). Line a baking sheet with parchment paper if desired.
- Step 2: Make the garlic-herb butter
- In a small bowl, mix the softened butter, garlic powder, dried oregano, and optional parsley until evenly combined.
- Step 3: Slice the rolls into three layers
- Separate the rolls if they are attached. Using a serrated knife, carefully slice each roll horizontally into three bread layers: a bottom, a middle, and a top. This creates two spaces for cheese in each slider.
- Keep the layers from each roll together so they are easy to reassemble.
- Step 4: Butter the bread
- Spread the garlic-herb butter over the cut surfaces of the bread. Divide it as evenly as possible among all 12 rolls.
- Step 5: Add the cheddar
- Cut or tear the cheddar slices into pieces that fit the rolls. Place cheese between the bottom and middle layers, then add more cheese between the middle and top layers.
- Divide the 8–10 slices among the 12 sliders, using additional cheese if you prefer them extra cheesy.
- Step 6: Arrange on the baking sheet
- Reassemble the sliders and place them on the prepared baking sheet. Keep a little space between them so the sides can brown.
- Step 7: Bake and flip
- Bake for 20–25 minutes, carefully flipping the sliders halfway through, until the bread is golden and the cheddar is melted.
- Use a thin spatula to turn each slider gently. If a little cheese escapes, tuck it back in before returning the sliders to the oven.
- Step 8: Serve warm
- Let the Hawaiian Roll Grilled Cheese Sliders cool for a minute or two, then serve while the cheese is warm and melty. Pair with tomato soup, marinara, or your favorite dip.
Notes
Conclusion
Hawaiian Roll Grilled Cheese Sliders are a simple way to make a batch of warm, cheesy sandwiches without cooking them one by one. The sweet rolls, garlic-herb butter, and melted cheddar make a comforting combination, while the three-layer assembly adds extra cheesy bites.
Bake until golden, turn them gently halfway through, and serve with a favorite dip while the cheese is still warm.